7zip is known for producing excellent compression ratios- sometimes even better than Winzip when using the 7Z for creating archives. (7z is the default format for Z-zip like the RAR is for WinRaR.)
First you want to select the files that you would like to archive. To highlight multiple files, press “CTRL + left click” on the specific files.
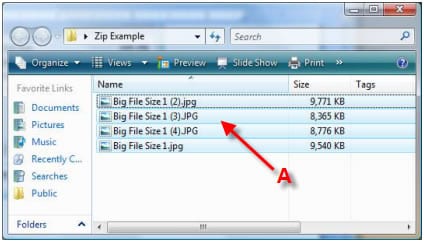
A – highlight the file(s) that you would like to archive. (CTRL+left click for multiple files)
Then you can right click the files to bring up the menu. Select “7-Zip” then > “Add to Archive.”
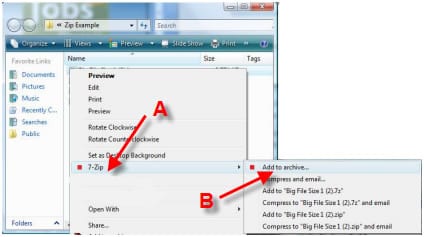
A – Select “7-Zip” from menu
B – Then Select “Add to archive…”
7Zip will then pull up a window with several drop down menu options. For basic needs, the only option you would need to adjust is the “Compression level” menu. Select the highest level “Ultra”. The higher the compression, the more memory it will use on your pc. Then click “OK”.
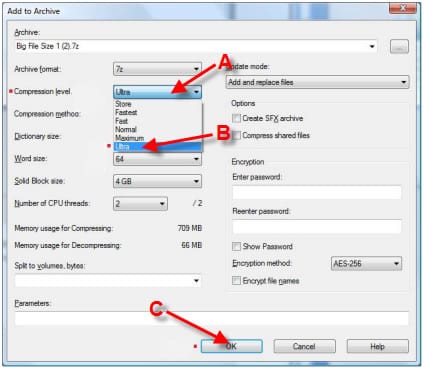
A – Go to “Compression level” drop down menu.
B – Select the “Ultra” level.
C – Click “OK”
After you click OK, 7-zip will bring up another window with a status bar informing you when the process will be completed.
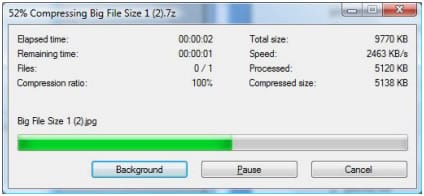
When complete, the 7zip file will be located in the same folder of the files you unless you specified another location.
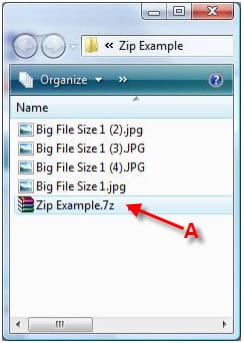
A – Complete 7zip archive file
For more help refer to other NGR 7-zip guides:
1. 7-Zip Download and Installation Guide
2. How to Extract / UnRAR with 7-Zip
3. How to Use 7-Zip to Split / Archive a File
4. How to create an Archive / Zip with 7-Zip
